Descrizione
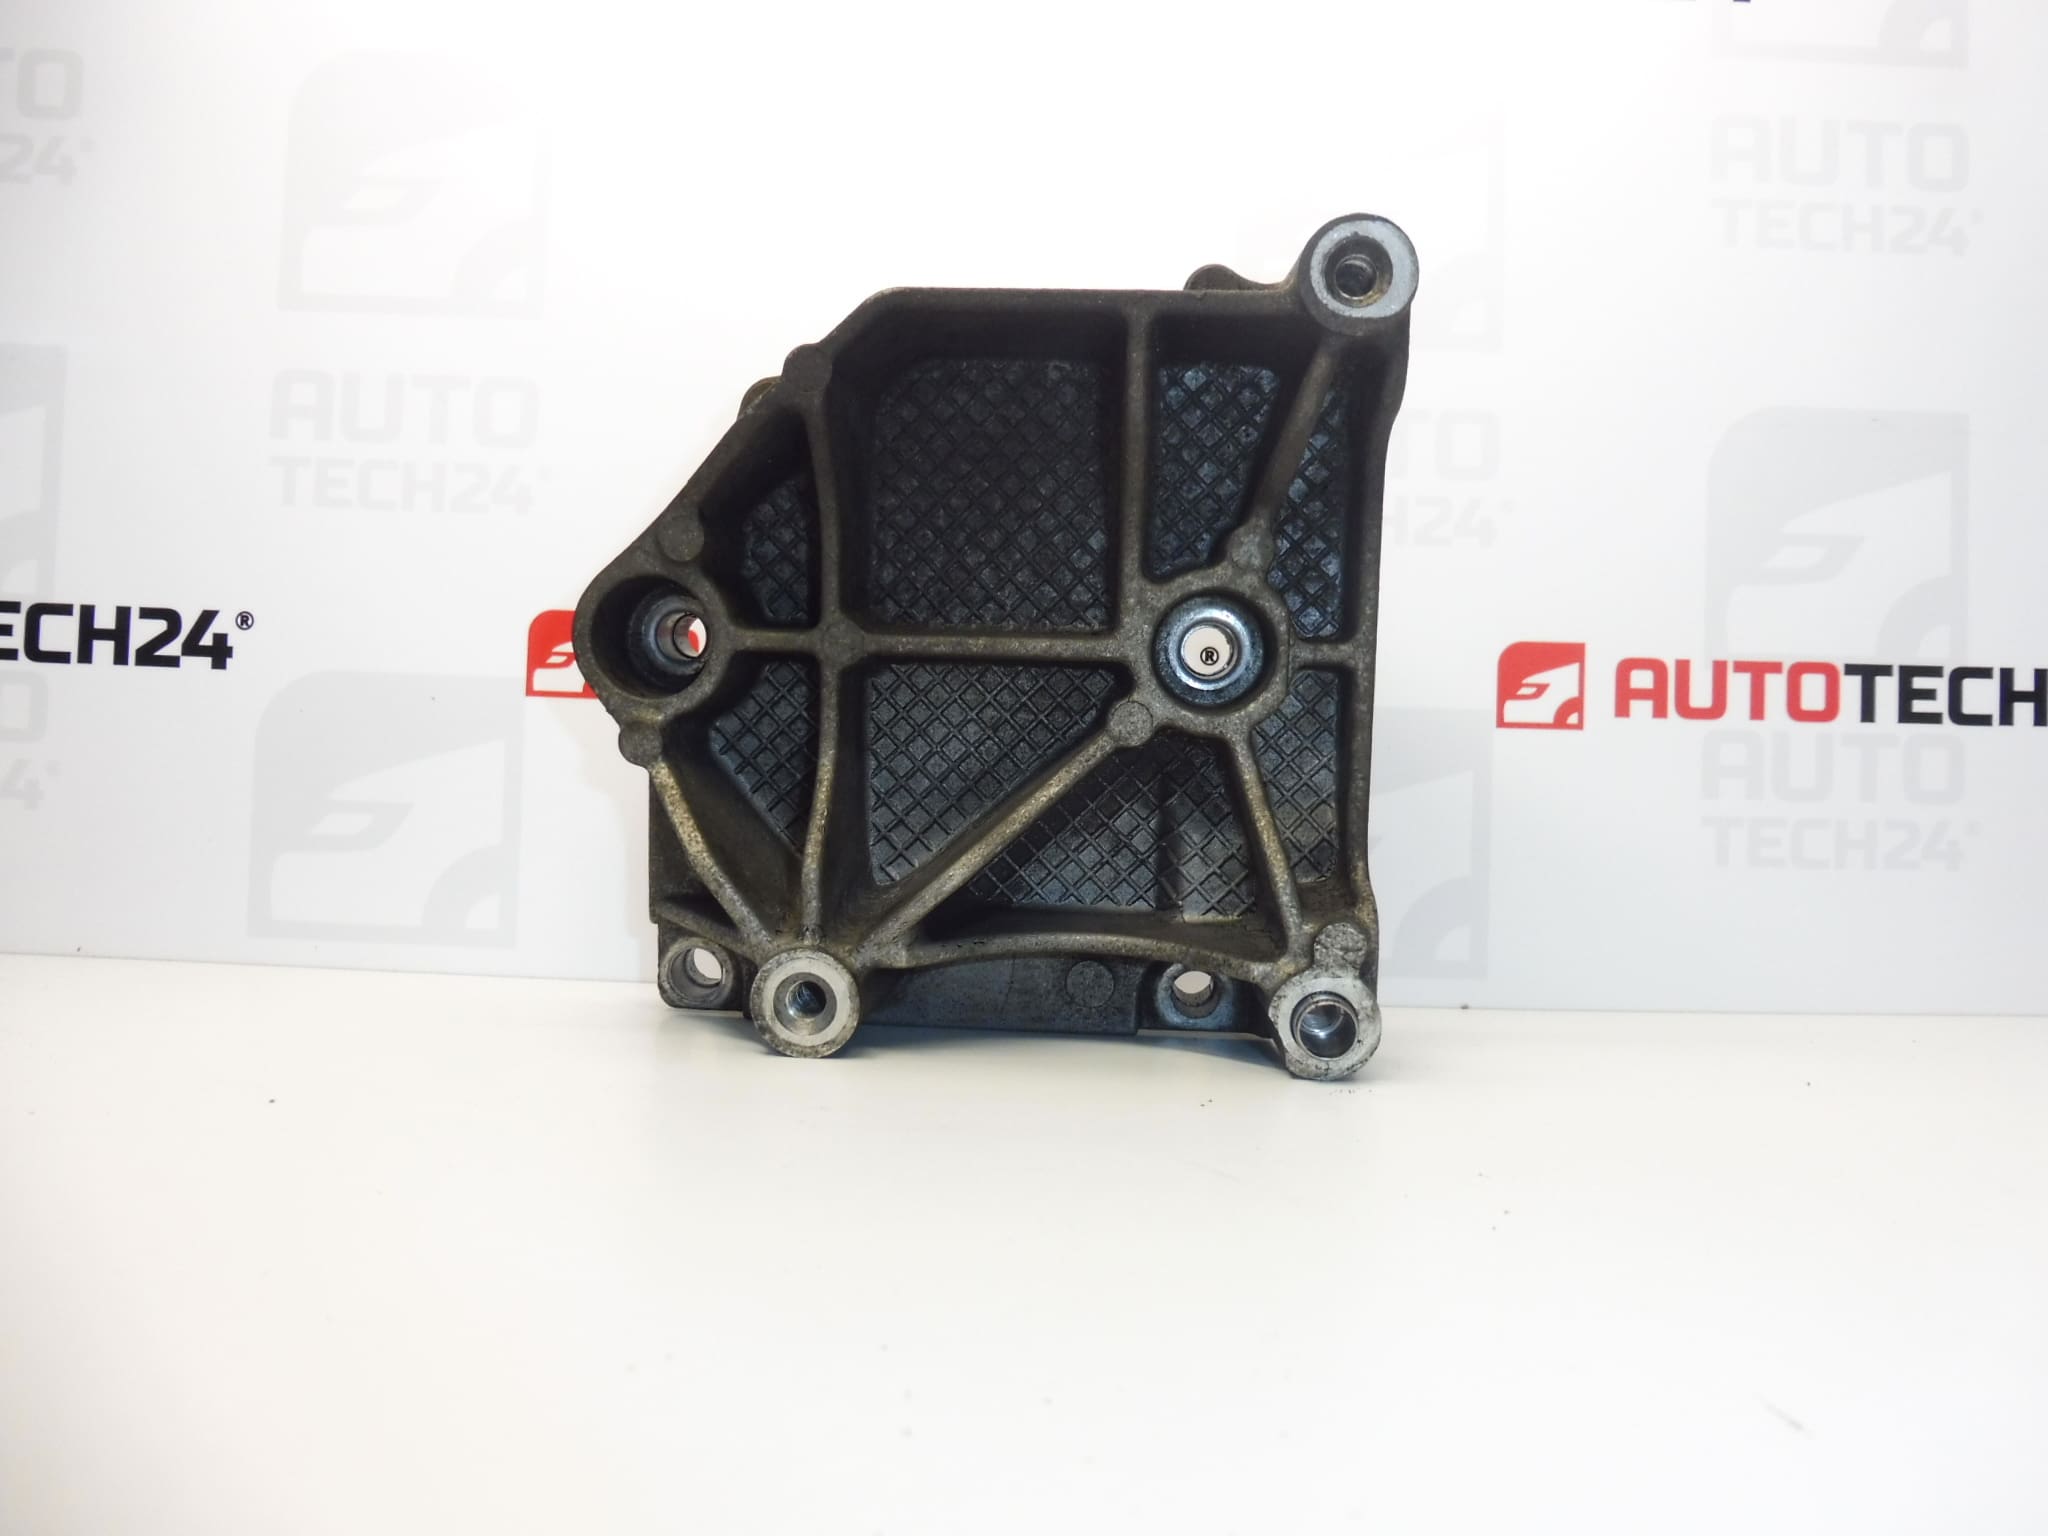
A/C compressor bracket for Citroën and Peugeot vehicles with 1.6 16V NFU engine
Part description
Used Citroën Peugeot A/C compressor bracket is designed to securely mount the air conditioning compressor and maintain its correct position relative to the belt drive. It is a suitable solution when replacing a cracked, deformed or otherwise damaged original bracket, provided it matches the specific vehicle configuration.
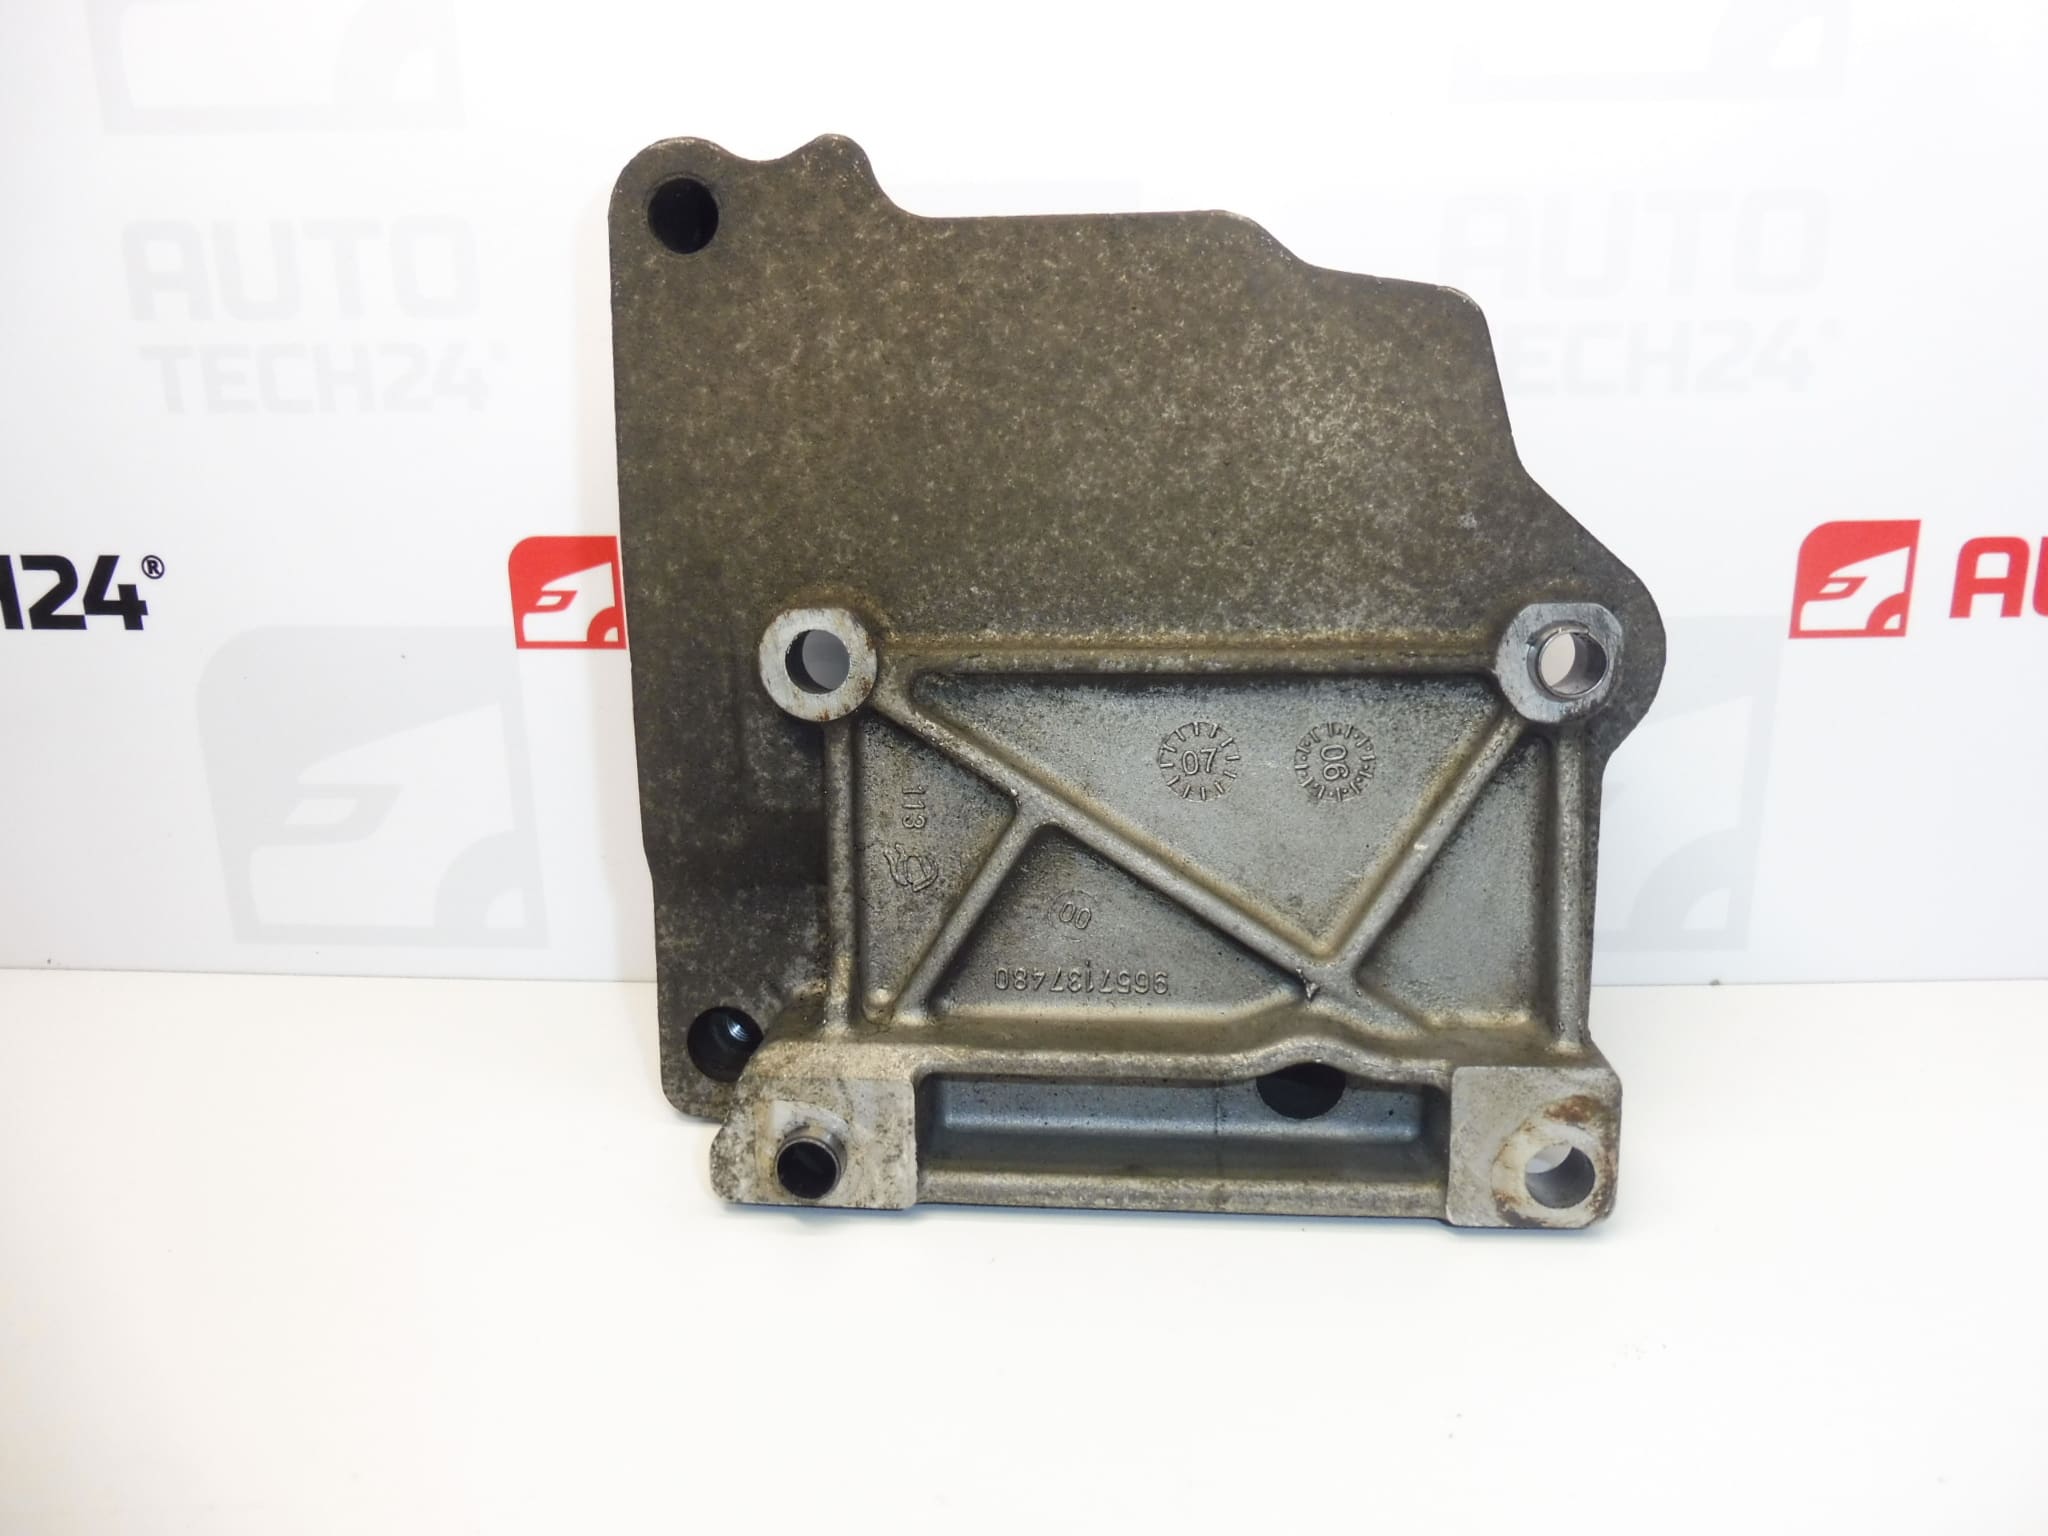
When selecting a bracket, refer primarily to the numbers 9657137480 and 6453KG and compare its design with the original part. A correctly selected bracket allows the compressor to be safely secured without modifying the mounting points.
Technical information
- Manufacturer: not specified; the source materials state Stellantis / CITROEN / PEUGEOT.
- Model: Citroën Berlingo, Citroën C3, Citroën C3 Pluriel, Citroën C4, Peugeot 206, Peugeot 206+, Peugeot 207, Peugeot 307, Peugeot Partner.
- Engine: 1.6 16V NFU.
- Part type: air conditioning compressor bracket.
- Condition: used auto part.
- Other numbers: not specified.
The models are taken from the product labels. The model name and engine alone do not guarantee that every bracket configuration is compatible; the matching identification and mounting design are also decisive.
Product codes
- Product codes: 9657137480, 6453KG.
Use both numbers when searching for a replacement A/C compressor bracket and comparing it with the original part.
Installation recommendations
The following procedure generally applies to this type of part. Exact access, the extent of disassembly and the tightening sequence depend on the specific model and vehicle configuration. Follow the manufacturer’s service procedure. Work on the refrigerant circuit should be entrusted to a professional workshop with the appropriate equipment.
1) Before installation
- Compare the identification, shape, hole spacing, contact surfaces and mounting design with the old bracket.
- Inspect the used part, especially around the mounting holes and stressed transitions. Check for cracks, deformation or damaged threads, if these are part of the bracket.
- Check the condition of the fasteners, opposing contact surfaces and compressor mounting points.
- Identify the cause of the original bracket’s damage so that the fault does not recur after replacement.
2) Required tools and materials
- A standard set of wrenches and sockets suitable for the fasteners.
- A torque wrench and the manufacturer’s service information for the specific vehicle.
- Suitable equipment for releasing the belt drive, depending on its design.
- A safe support or suitable means of suspending the compressor.
- Cleaning products, a brush, cloths and protective equipment.
- If working underneath the vehicle, suitable lifting and securing equipment.
3) Step-by-step installation procedure
- Park the vehicle on a level surface, secure it against movement and allow the engine to cool. Prevent the engine from starting unintentionally.
- Following the vehicle’s service procedure, disconnect the battery and provide access to the work area. If you raise the vehicle, support it securely.
- Before disassembly, record the belt routing and the position of the removed components, for example by taking a photo.
- Following the procedure specified for the particular configuration, release the belt tension and remove the belt as far as necessary for the work.
- Safely support or suspend the compressor before releasing its mountings. Its weight must not be carried by the air conditioning hoses or pipes.
- Release the compressor and carefully move it aside only as far as the connected lines allow. If you cannot continue without disconnecting the circuit, stop work and arrange for the refrigerant to be professionally recovered. Do not release refrigerant into the environment.
- Remove the original bracket’s fasteners and take off the bracket. Note their original positions and any differences in configuration.
- Clean the contact surfaces and inspect the opposing mounting points. Repair damaged threads or deformed surfaces before installing the replacement part.
- Position the replacement bracket without force and initially fit the fasteners by hand. The bracket must seat correctly; it must not be pulled into position by tightening the bolts.
- Secure the bracket and compressor in the sequence and with the tightening torque specified in the manufacturer’s service procedure. Check that the compressor sits without strain and that the air conditioning lines are not under stress.
- Check the condition of the belt and related drive components. Route the belt correctly and restore its tension using the specified procedure.
- Reinstall the removed components, remove the compressor support and take away the tools. Restore the electrical power supply according to the manufacturer’s procedure.
4) Post-installation checks and test drive / function verification
- Before starting the engine, check that all fasteners are in place, the belt is seated correctly and there is adequate clearance around moving components.
- After starting the engine, observe the drive operation from a safe distance. Do not touch the moving belt or pulleys.
- Check the air conditioning operation and listen for knocking, squealing or unusual vibrations. If operation is irregular, switch off the engine and identify and correct the cause.
- If everything is in order, take a short test drive and then, with the engine switched off, inspect the mounting and nearby lines again.
5) Most common installation errors + how to avoid them
- Selecting the part based only on the vehicle model: also compare the codes and the complete bracket configuration.
- Tightening over dirt or when the part is not seated correctly: clean the surfaces and check that the part is seated without strain before tightening.
- Leaving the compressor hanging from the hoses: always support or suspend it separately.
- Using incorrect bolts or tightening by feel: use the specified fasteners and follow the manufacturer’s service information.
- Incorrect belt routing: record its route before removal and check that it is seated correctly after installation.
- Replacing the bracket without addressing the cause of the fault: also inspect the compressor, belt drive and related mountings.
Reasons why the part gets damaged
In general, A/C compressor brackets are damaged primarily by mechanical overload, prolonged vibration or incorrect installation. This is not a description of the condition observed on this specific item.
- Loose fasteners cause the bracket to move and repeatedly stress the mounting holes.
- Incorrect tightening or installation under strain can damage the threads, contact surfaces or the bracket itself.
- A fault in the compressor or belt drive can increase the load and vibrations transmitted to the mount.
- Impact or careless handling during repair can cause deformation or cracking.
- Prolonged cyclic stress can lead to fatigue cracks, especially if the mount is already weakened.