Descrizione
Air conditioning fan for vehicles from the Stellantis group CITROEN PEUGEOT OPEL FIAT TOYOTA
Part description
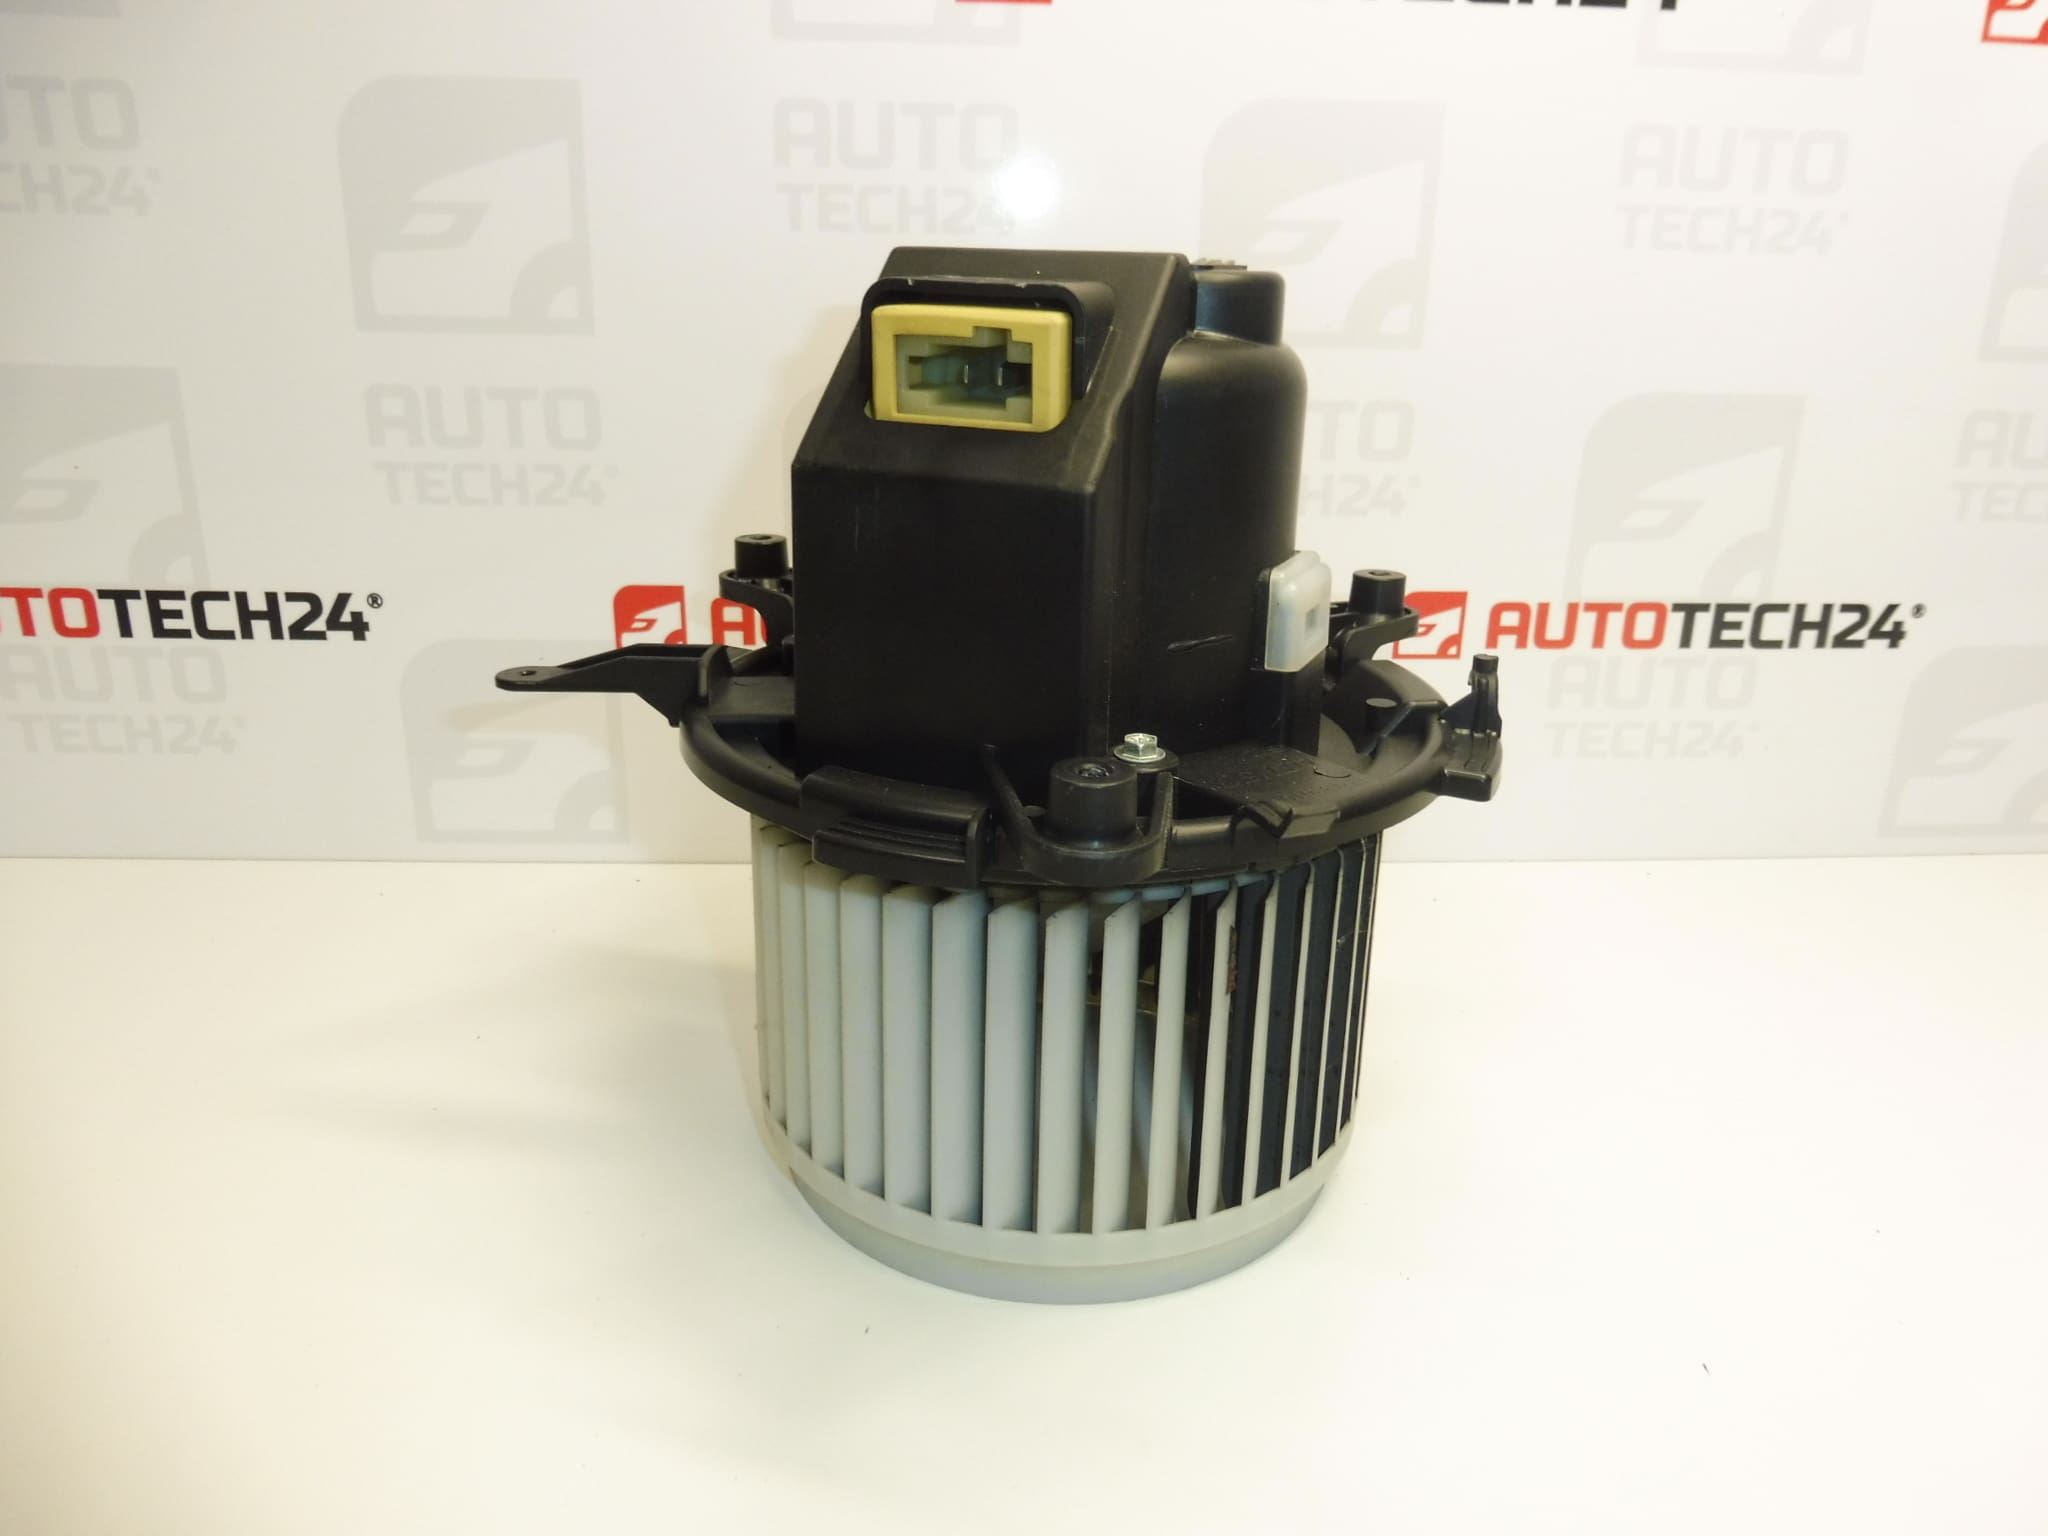
Used Citroën Peugeot heater and air conditioning fan ensures airflow through the heating and air conditioning system into the cabin. Proper fan operation is important for passenger comfort and effective window demisting. As a replacement part, it may be a solution if the original fan is not working, is noisy or runs intermittently, provided diagnostics confirm that the fault is directly with the fan.
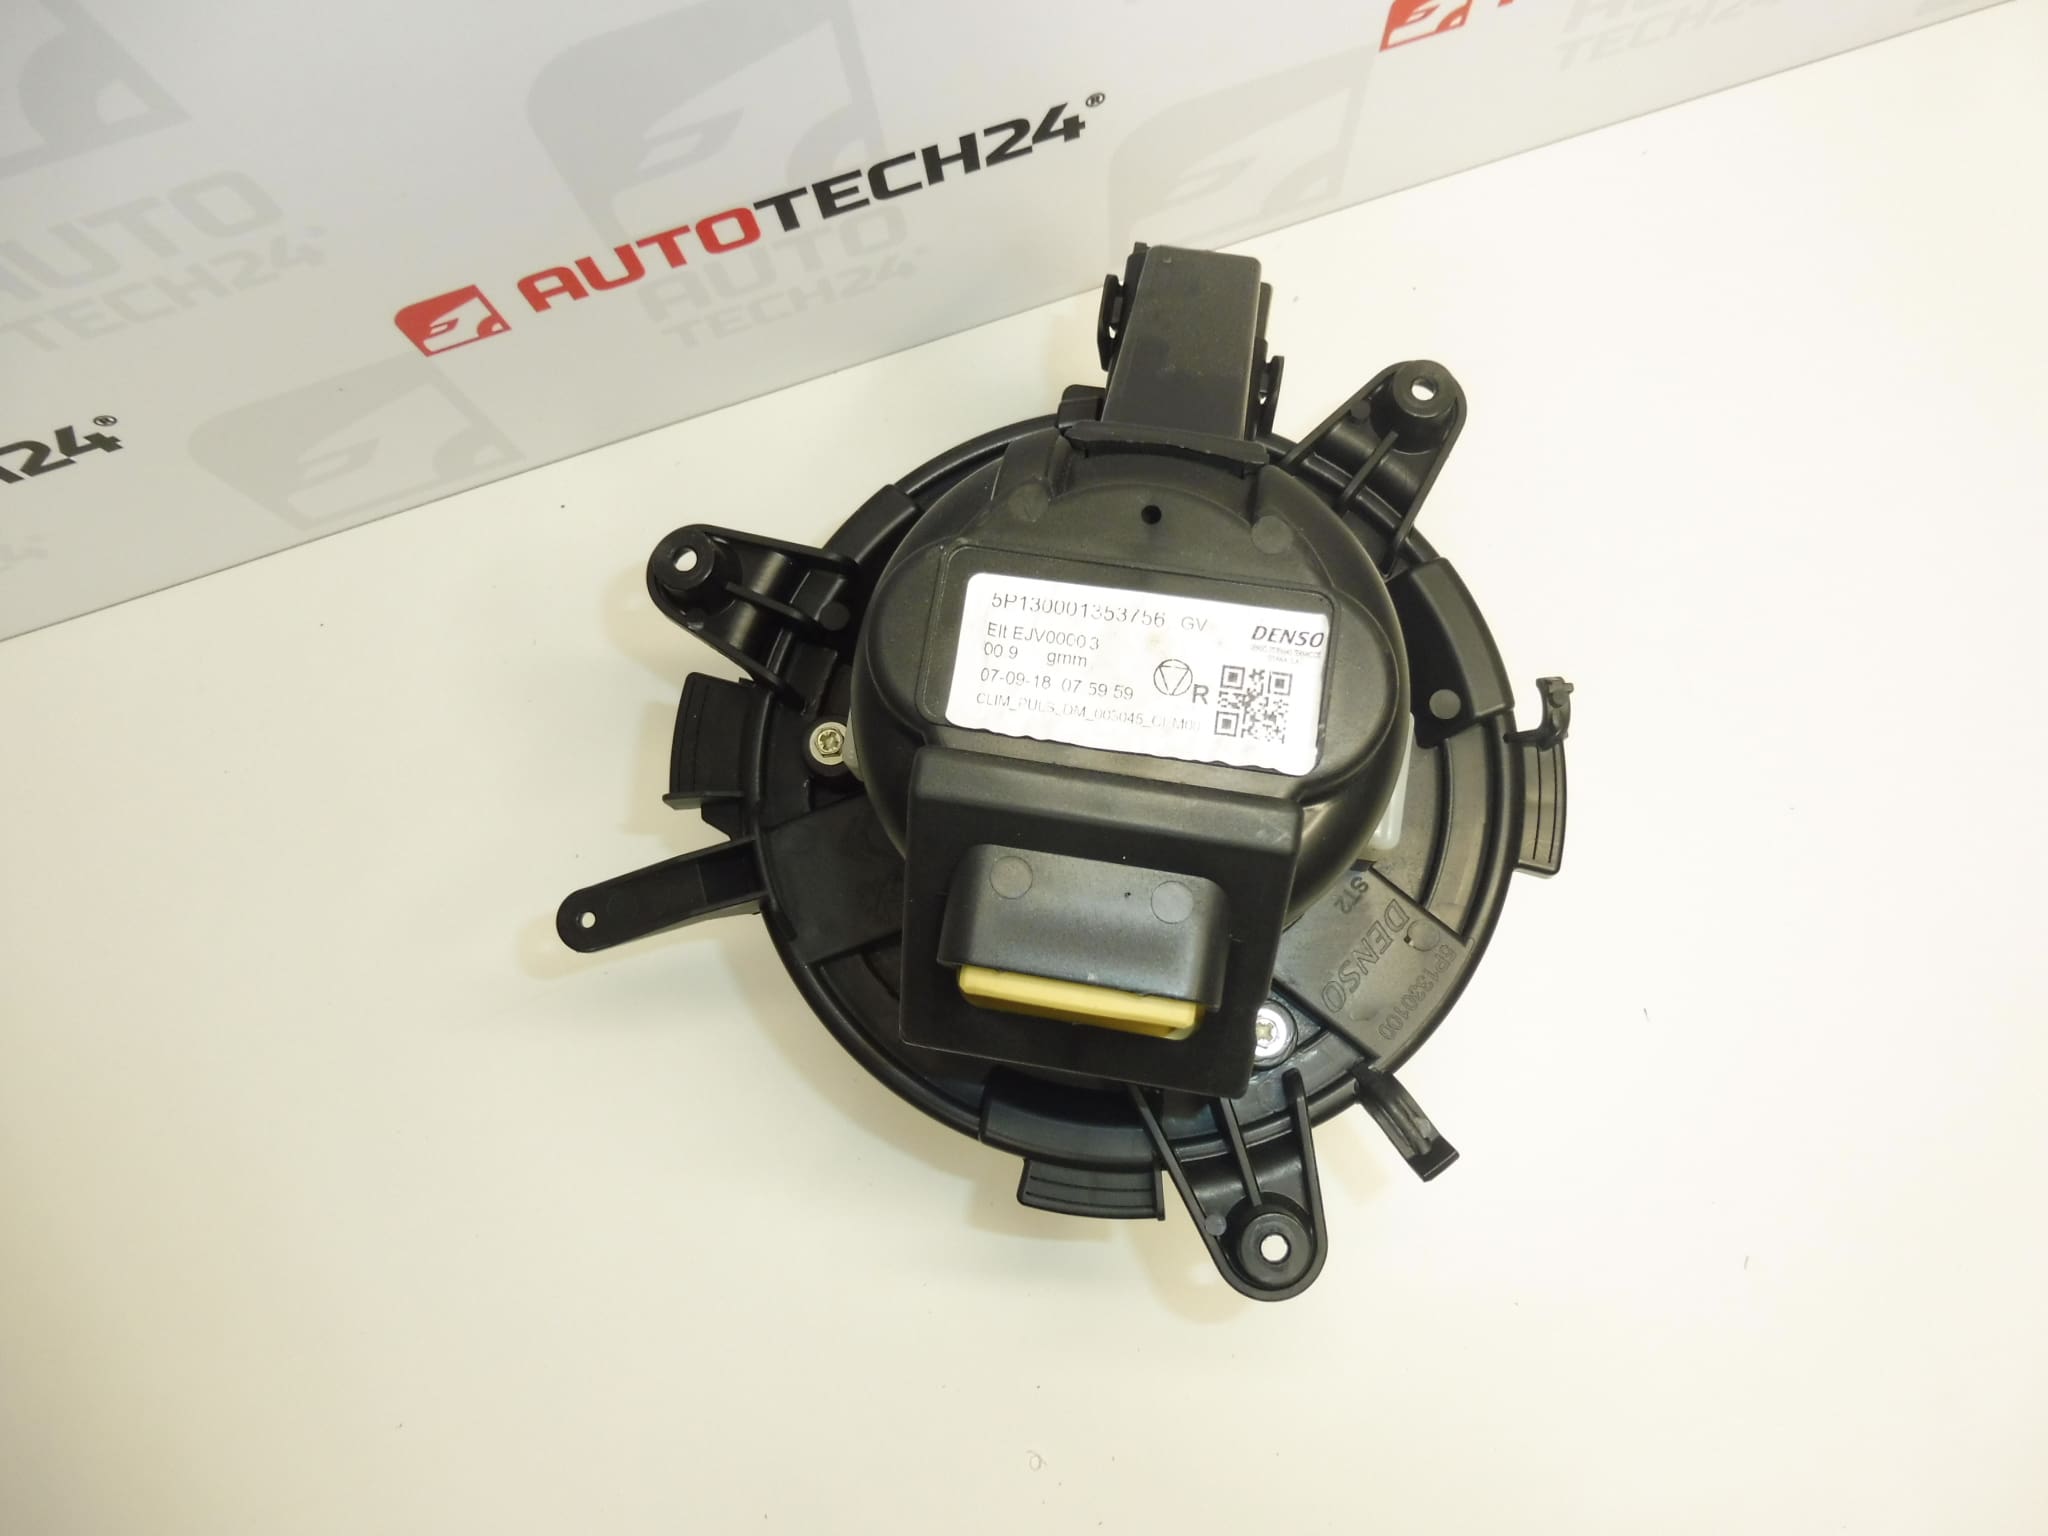
The part is listed under numbers 9821292180 and 9849717380. The available information associates it with the Citroën Berlingo K9, OPEL COMBO E K9, PEUGEOT PARTNER III and PEUGEOT RIFTER models. When selecting a part, compare the original part number, connector design, housing shape and mounting points; the model name alone is not enough to identify the correct variant.
Technical information
- Manufacturer: not specified; the available information lists the designation Stellantis CITROEN PEUGEOT.
- Model: Citroën Berlingo K9, OPEL COMBO E K9, PEUGEOT PARTNER III, PEUGEOT RIFTER.
- Part type: heater and air conditioning fan.
- Condition: used automotive part.
- Additional numbers: not specified.
- Model years, engine variants and electrical specifications: not specified.
Product codes
- Product codes: 9821292180, 9849717380.
Both numbers are listed for this product. Before installation, compare the markings and design with the original fan; the available information does not specify the conditions under which the individual versions are interchangeable.
Installation recommendations
The following procedure generally applies to this type of part. The exact access to the fan, how it is released and the procedure for disconnecting the electrical system depend on the specific vehicle model and configuration. Follow the manufacturer’s service procedure.
1) Before installation
- First, verify the cause of the fault. A ventilation problem may also be related to the power supply, fuse, wiring, speed control or controls, and not just the fan.
- Compare the product number, connector, number and arrangement of contacts, housing dimensions, impeller and mounting points with the old part.
- Inspect the used part: check for cracks, damaged blades, dirt, signs of moisture and the condition of the contacts.
- With the power disconnected, carefully check that the impeller turns freely without catching or touching the housing. Do not apply force to the blades.
2) Tools and materials required
- Standard hand tools suitable for the fasteners used, and plastic tools for carefully releasing trim.
- A flashlight, protective gloves and a container for small fasteners.
- A vacuum cleaner, soft brush and clean cloth for removing dirt from accessible areas.
- A suitable measuring instrument for checking the electrical circuit, if the check is performed by someone familiar with automotive electrical systems.
3) Step-by-step installation procedure
- Secure the vehicle against movement, switch off the ventilation and ignition, and follow the manufacturer’s instructions for safely disconnecting the battery, including any required waiting periods.
- Access the fan according to the service procedure. Release covers and trim using suitable tools and without forcing them.
- Before disconnecting anything, note the wiring route, connector position and orientation of the original part.
- Release the connector lock and disconnect it by pulling on the connector housing, not the wires. Check for signs of burning, corrosion or loose contacts.
- Support the fan and release its mounting as specified by the manufacturer. Protect the impeller and surrounding components when removing it.
- Clean the accessible mounting area and remove leaves or other foreign objects. Also check the condition of the cabin filter, if the vehicle is equipped with one, and look for any signs of water ingress.
- Compare the removed part with the replacement again. If the connector or mounting differs, stop the installation; do not modify the wiring or housing to force the part to fit.
- Fit the replacement fan in the correct orientation. If a seal is part of the mounting, check its condition and ensure that it is seated correctly.
- Secure all fasteners according to the manufacturer’s procedure. Avoid overtightening fasteners in plastic parts.
- Connect the connector until it locks into place and route the wiring along its original path, away from moving parts and areas where it could be pinched.
- Refit the removed covers and trim, remove the tools and restore the power supply according to the vehicle manufacturer’s instructions.
4) Post-installation checks and functional testing
- With the vehicle stationary, test the available fan speeds or speed-control range. The fan should respond to the controls without cutting out.
- Listen for scraping, knocking or unusual whistling, and check for any vibration.
- Check airflow from the vents and the demisting function. The fan running by itself does not confirm that the entire heating or air conditioning system is working properly.
- If you smell overheating or the fan runs intermittently, switch it off and investigate the cause. Take a short test drive only after the stationary checks have been completed successfully and visibility is clear.
5) Common installation mistakes and how to avoid them
- Replacing the part without verifying the cause: also check the power supply and controls first, so that the replacement does not address a different fault.
- Leaving dirt in the mounting area: clean the accessible space before fitting the part, otherwise the impeller may become noisy or jam.
- Damaging the blades during handling: hold the part by its housing and do not place its weight on the impeller.
- Incorrectly seated mounting or seal: check that it is seated properly before tightening, which helps prevent vibrations and air leaks.
- Connecting to a damaged connector: have burnt or loose contacts professionally repaired first; replacing the fan alone will not fix this problem.
Reasons why the part may become damaged
The following are general causes of faults that may occur with heater and air conditioning fans; they do not describe the condition found in this specific unit:
- Wear of the motor and its bearings due to prolonged operation, which may result in noise, play or intermittent operation.
- Foreign objects entering the impeller, causing scraping, imbalance or blade damage.
- Moisture and water ingress, which may cause corrosion of the contacts and internal motor components.
- Impeller blockage and subsequent motor overheating.
- Faulty electrical connections, particularly loose or oxidized contacts, which may overheat locally.
- Careless handling or incorrect installation, which may cause the housing to crack, the impeller to deform or the mounting to become damaged.