Descrizione
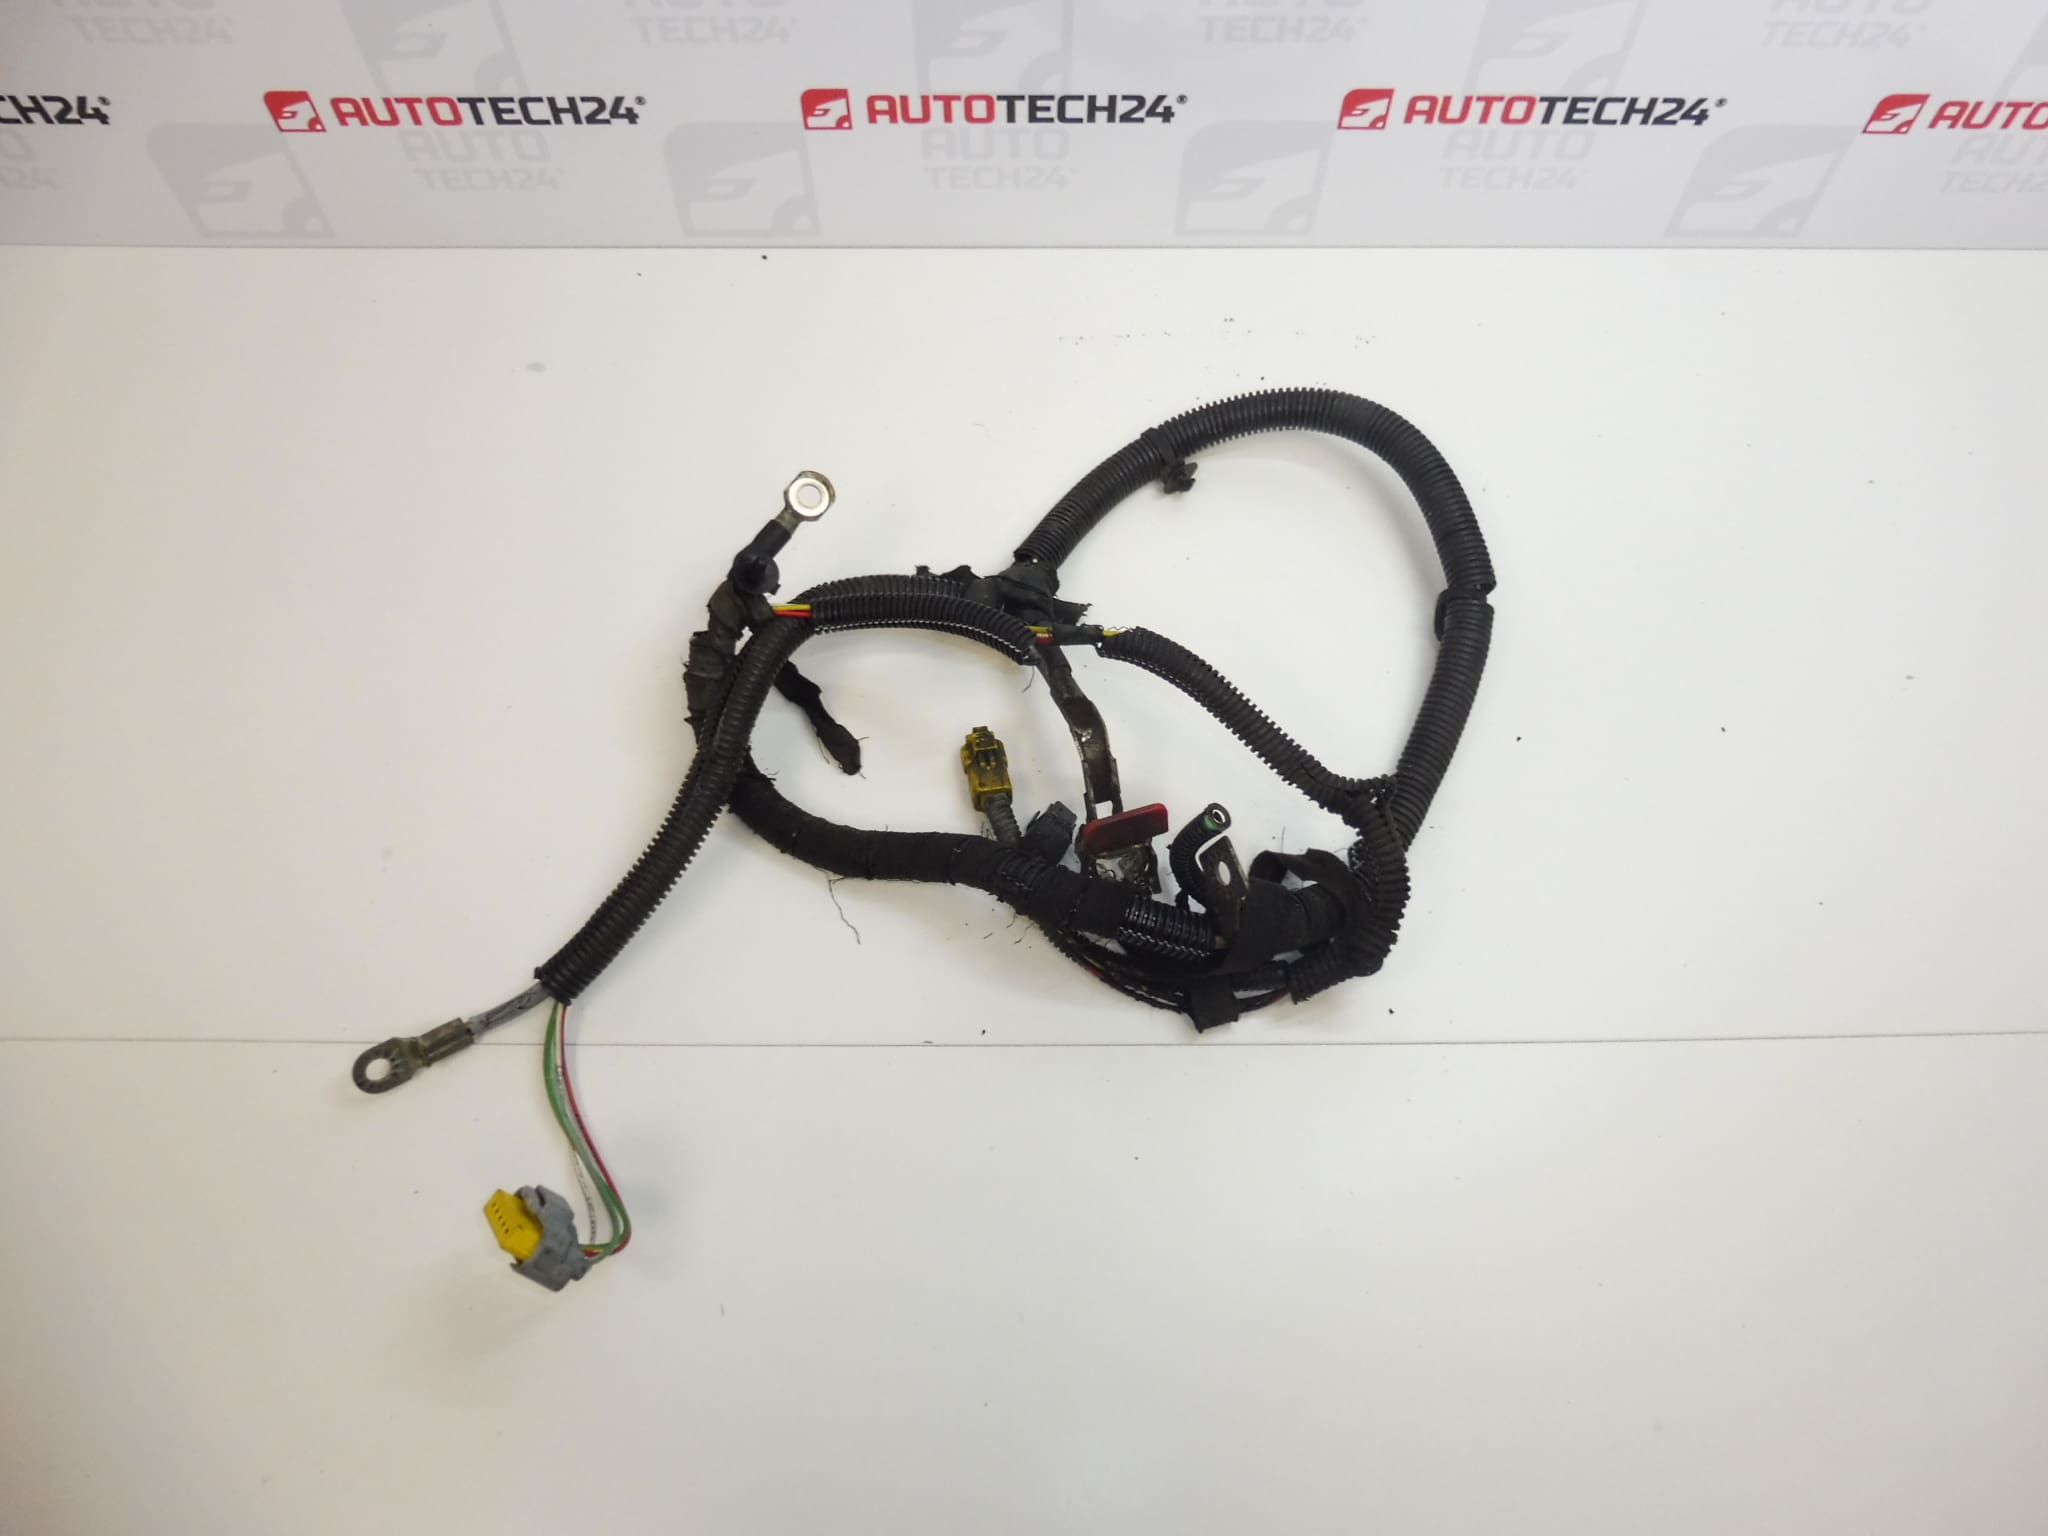
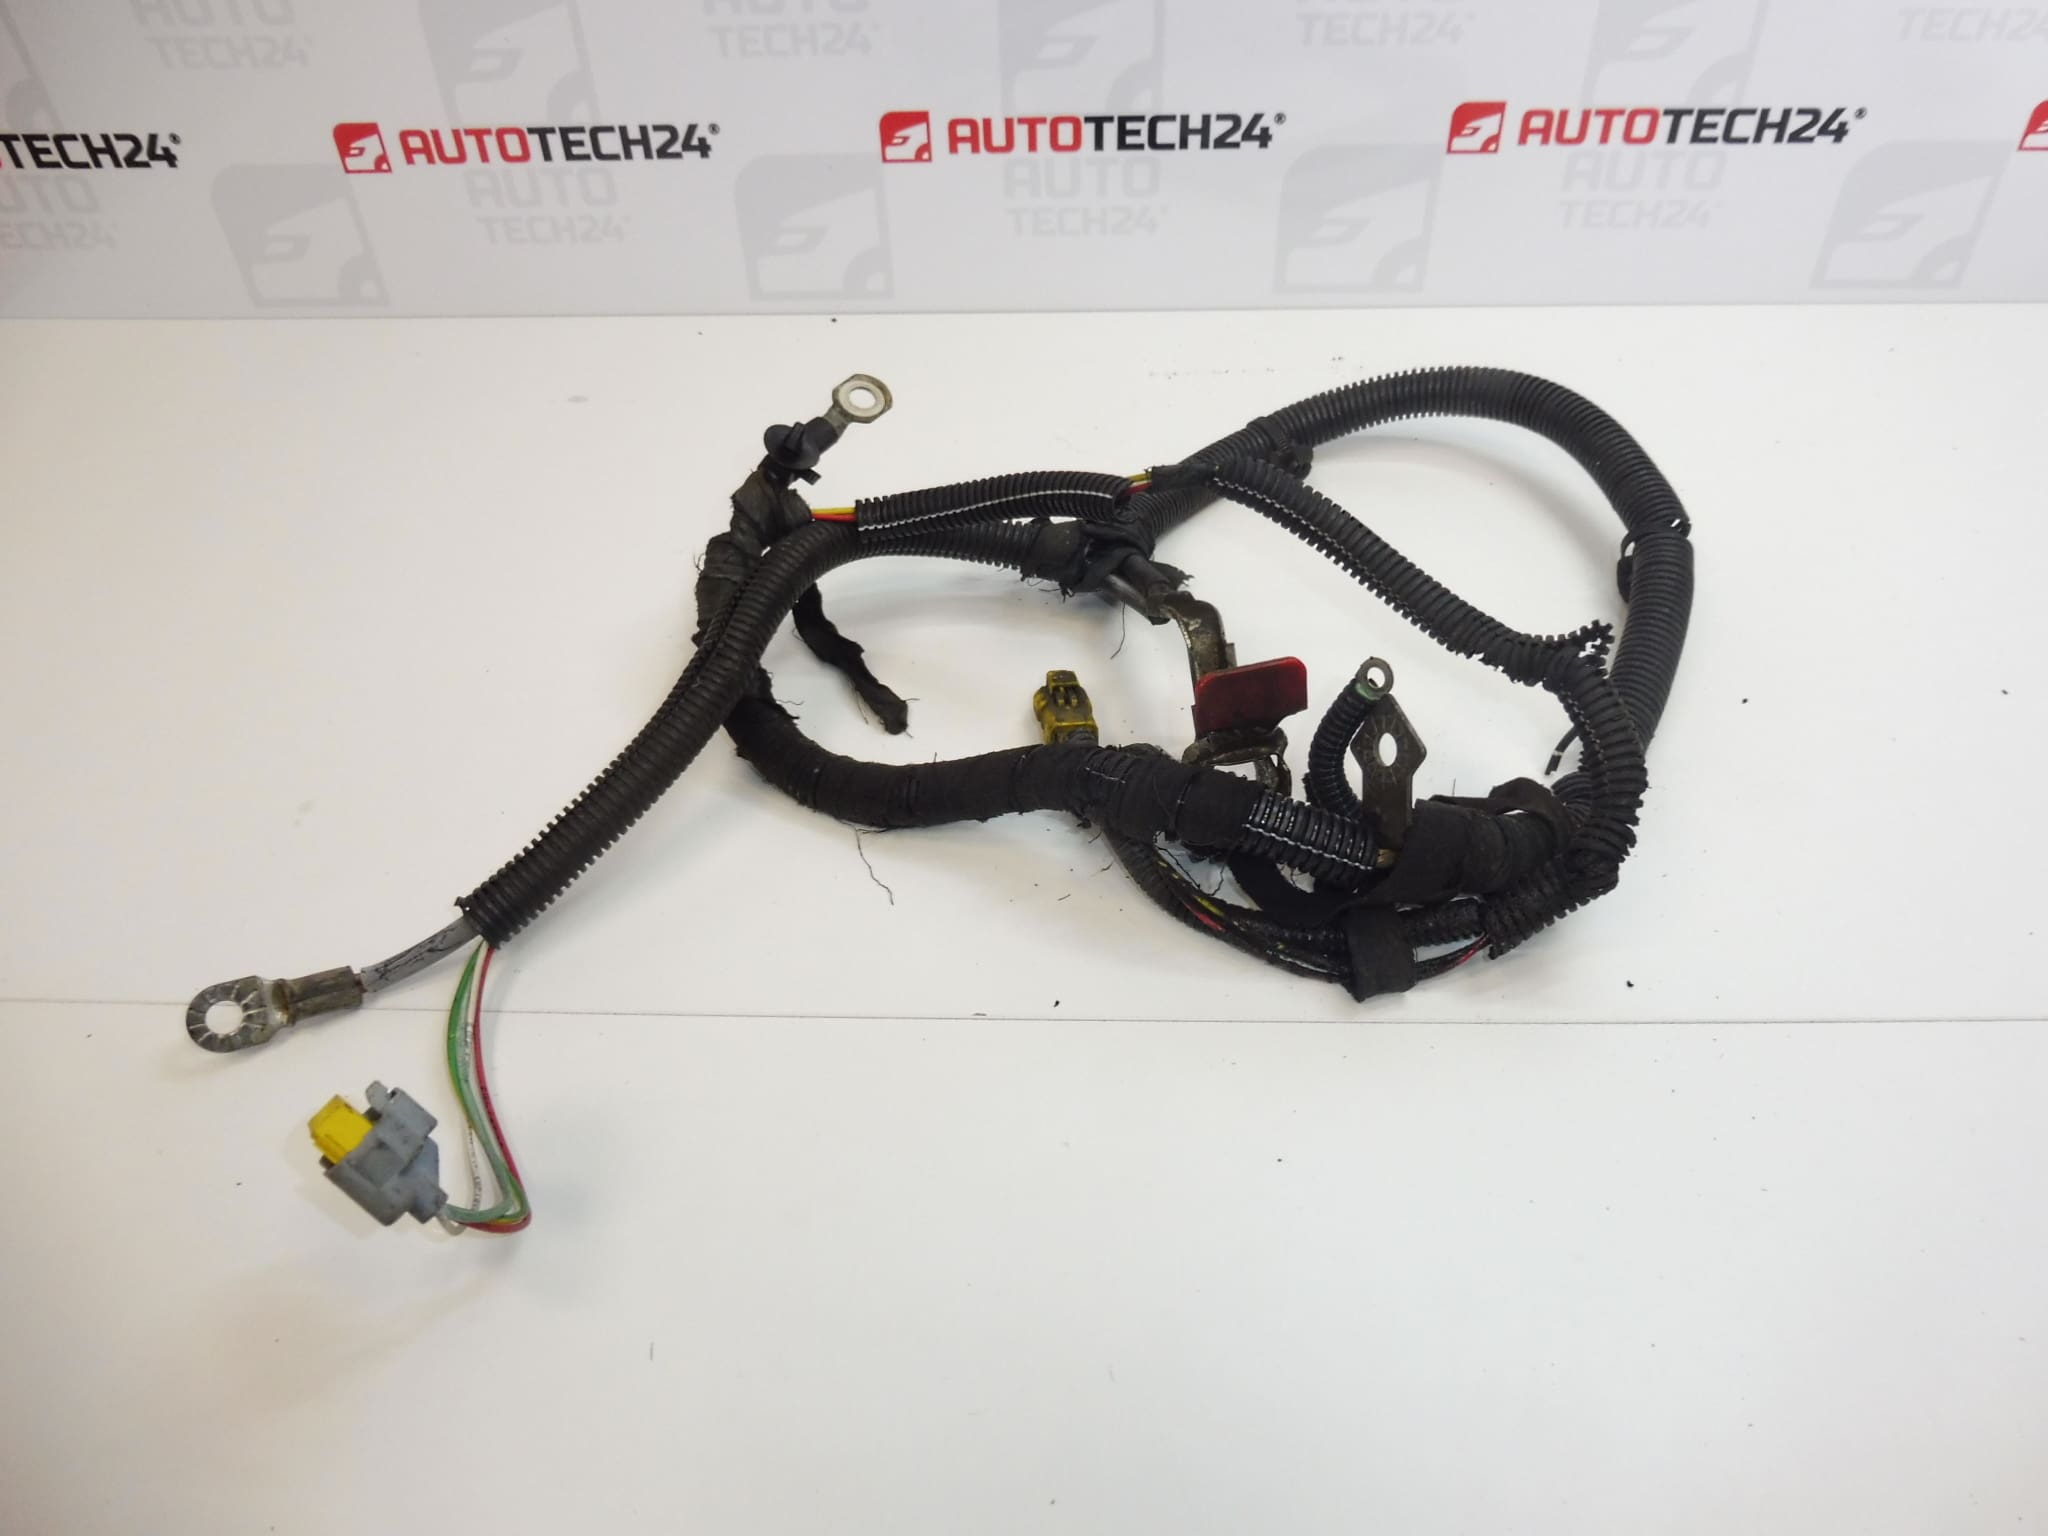
Complete + battery harness for 2.0 16V engines
From PEUGEOT 307 2.0 16V RFJ
Part description
Positive battery cable Citroën Peugeot 2.0 16V is a used complete positive battery harness that carries power between the battery and the connected electrical circuits. The part offered comes from a Peugeot 307 2.0 16V RFJ and belongs to the engine wiring harness category.
It is a suitable solution when replacing a harness with damaged insulation, corroded terminals, or compromised wires. The complete harness allows you to replace the corresponding original wiring without improvised repairs to individual sections. When selecting a part, compare in particular the product numbers 9655329880, 9661639980 and 5642GF, the design of the terminals, and the branching with the harness in your vehicle. Engine displacement alone is not sufficient to determine whether the design is suitable.
Technical information
- Manufacturer: not specified; the source information lists the designation Stellantis CITROEN PEUGEOT.
- Model: Peugeot 307.
- Engine listed in the source information: 2.0 16V; donor vehicle 2.0 16V RFJ.
- Part type: complete positive (+) battery wiring harness.
- Category: electrical components, wiring harnesses, engine harnesses.
- Condition: used part.
- Additional numbers: not specified.
- Additional designation in the source information: NFP.
Product codes
- Product codes: 9655329880, 9661639980, 5642GF.
- Model: Peugeot 307.
The numbers listed can be used to find the part and compare it with the designation on the original harness. Also check its physical design and connection points.
Installation recommendations
The following procedure applies generally to this type of part. The exact cable routing, access to connection points, and battery disconnection procedure depend on the specific model and vehicle configuration. Follow the manufacturer’s service procedure. The positive battery cable can cause a short circuit if it comes into contact with the vehicle ground, so never work on it while it is live.
1) Before installation
- Compare the markings on the old and replacement parts, the length and branching of the harness, the shape of the terminals, any connectors, protective sleeves, and mounting points.
- Inspect the insulation along the entire accessible length. Look for cracks, abrasion, signs of melting, or hardening caused by heat.
- Check the terminals and their connections to the wires. They must not be loose, significantly corroded, or mechanically damaged.
- Identify the cause of the damage to the original cable to prevent the fault from recurring. Do not install a harness with exposed wires or signs of overheating.
2) Required tools and materials
- Hand tools appropriate for the connections used, preferably with insulated handles.
- Tools for carefully releasing clips and protective covers.
- Suitable electrical contact cleaner and a clean cloth.
- Multimeter, work gloves, and safety glasses.
- A tool for labeling connections and safely covering the disconnected battery terminals.
3) Step-by-step installation procedure
- Secure the vehicle safely, switch off the ignition and all electrical equipment. Observe the time and conditions specified by the manufacturer for the electronics to enter sleep mode.
- Disconnect the battery according to the service procedure. Generally, disconnect the negative terminal first, then the positive terminal. Secure the disconnected terminals to prevent accidental contact.
- Document the original harness route, its connections, and the locations of the clips. Label individual branches if necessary.
- Carefully remove the covers and clips required for access. Do not pull on the wires or put strain on the surrounding wiring.
- Disconnect the terminals and any connectors on the original harness one by one. Make sure no connection is left hidden or under tension.
- Remove the original harness and compare all branches, terminals, and mounting points with the replacement part again. If the design differs, do not continue by making forced modifications.
- Inspect the mating contact surfaces and mounting hardware. Remove dirt and any surface oxidation using an appropriate method; have any damaged connection point professionally repaired first.
- Route the replacement harness along the original path. Prevent contact with sharp edges, hot surfaces, and moving parts; the wires must not be stretched or pinched.
- Connect all terminals and any connectors. Tighten bolted connections according to the manufacturer’s specifications and check that the connectors are properly secured.
- Refit the clips, protective sleeves, and covers. Before reconnecting the battery, check that no unprotected positive terminal can come into contact with the vehicle ground.
- Reconnect the battery according to the manufacturer’s procedure; generally, connect the positive terminal first, then the negative terminal. Perform the required procedures after restoring power.
4) Post-installation checks and function verification
- Check that the connections are secure, the positive terminals are properly covered, and the entire harness is fastened in place.
- Test the electrical equipment and start the engine. Watch for unusual power interruptions, odors, or signs of overheating.
- If necessary, have the voltage drop across the wiring measured under load. A continuity check alone may not reveal a high-resistance connection.
- If everything works correctly, take a short test drive and then visually inspect the harness routing. If there is smoke, an odor, or overheating, safely stop the vehicle and address the fault immediately.
5) Common installation mistakes and how to avoid them
- Working with the battery connected: always safely disconnect the power supply according to the manufacturer’s procedure before handling the part.
- Mixing up branches or terminals: document the connections before removal and compare each connection point during installation.
- Connections that are too loose or overtightened: follow the specified tightening procedure; a loose connection can overheat, while an overtightened one can be damaged.
- Incorrect cable routing: use the original route and clips so the harness is not subjected to vibration, tension, or friction.
- Leaving corroded contacts in place: check the mating surfaces before installation too; otherwise, the problem may persist even after replacing the harness.
Reasons why the part gets damaged
For positive battery harnesses, the following are common causes of damage; they are not a description of any faults identified on this particular item:
- Corroded contacts and moisture ingress, which increase contact resistance and can cause connections to heat up.
- Loose connections caused by incorrect tightening or long-term vibration.
- Abraded insulation due to missing clips or improper cable routing.
- Heat stress and aging of the insulation, which can make the protective covering brittle and cause it to crack.
- Mechanical damage during repairs, for example pulling on the cable, pinching the harness, or deforming the terminals.
- A short circuit or excessive current load, which can damage the wires, insulation, and connection points.